

Importing data
You might want to import data into your application's database from a file, which can be located in your application's resource files or can be accessed through a url. This is done in the following way:
To import data from a file into your application's database you will need to present it as a comma separated values (CSV) file. In Excel for example, this file format can be easily picked in the list of save options. An entry in a csv-file may look somewhat like this: 492;John Major;Downing Street;10;LONDON
The character, in this case the semi-colon that separates the columns of data in your file is called the delimiter. In fact, this is usually the delimiter used by Excel if you choose the CSV format.
Importing CSV-files
To import the csv-file into the application, click the "import" button in the backstage. The import screen appears, together with some descriptive text. Most options are self-explantory, hovering above them will reveal informative tooltips. By default, the semi-colon is chosen as the delimiter. If you check "First line contains header", the first line of your import file containing the column header, will not be used as input data.
Next you need to define in which (target) class you want to import your data. A list of available classes from your application will be presented.
More advanced import options are also possible, explanations of those are provided in their respective tooltips.
A typical set of clicks would be:
- click the icon to import the file
- upload the csv file you want to import
- select the target class
- click 'Next screen>'
The data mapping screen appears:
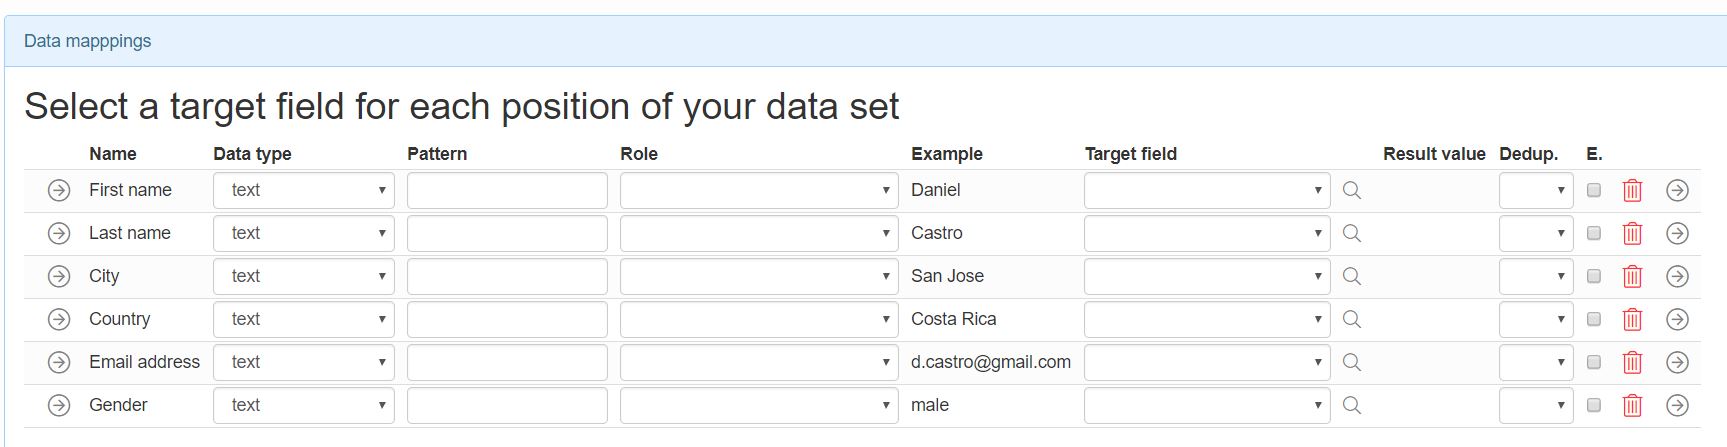
The first column shows the column names of the import file (if these are present in the file, otherwise the values of the first line will be used). The next column contains the datatype of the column. This is determined automatically by the system, and it is possible to change the datatype if needed.
The fourth column shows an example of the imported data, in this case the first line of the import file. This makes it easy to select the target fields in the next column. Now, you can match the column data in your import file with the target fields of the target class in your application. Make sure the datatype of the source matches the datatype of the target field.
- click 'refresh'
- verify the column with the 'result value'
- click 'next screen'
- click 'ok'
Constants
If you want a field to always have the same value, for example country should always be 'Italy'.

- do not select a target field for the constant field
- select the field and set a value in the constants menu
- click refresh to check the result value
- click refresh to check the result value
- click 'ok'
if you want a constant field to obtain the value of another field then go to the 'details'. Add the following line to calculation:
#set($return = $data.get('columnname'))
Using the "role" column to subdivide data
You may have noticed that we skipped the third column "role". If the fields in your import file completely match the target fields you do not need the "role" column. But there may be cases in which you want to further separate the data of your import file. Role makes it possible to automatically separate the data and subdivide it into the different target fields. An example:
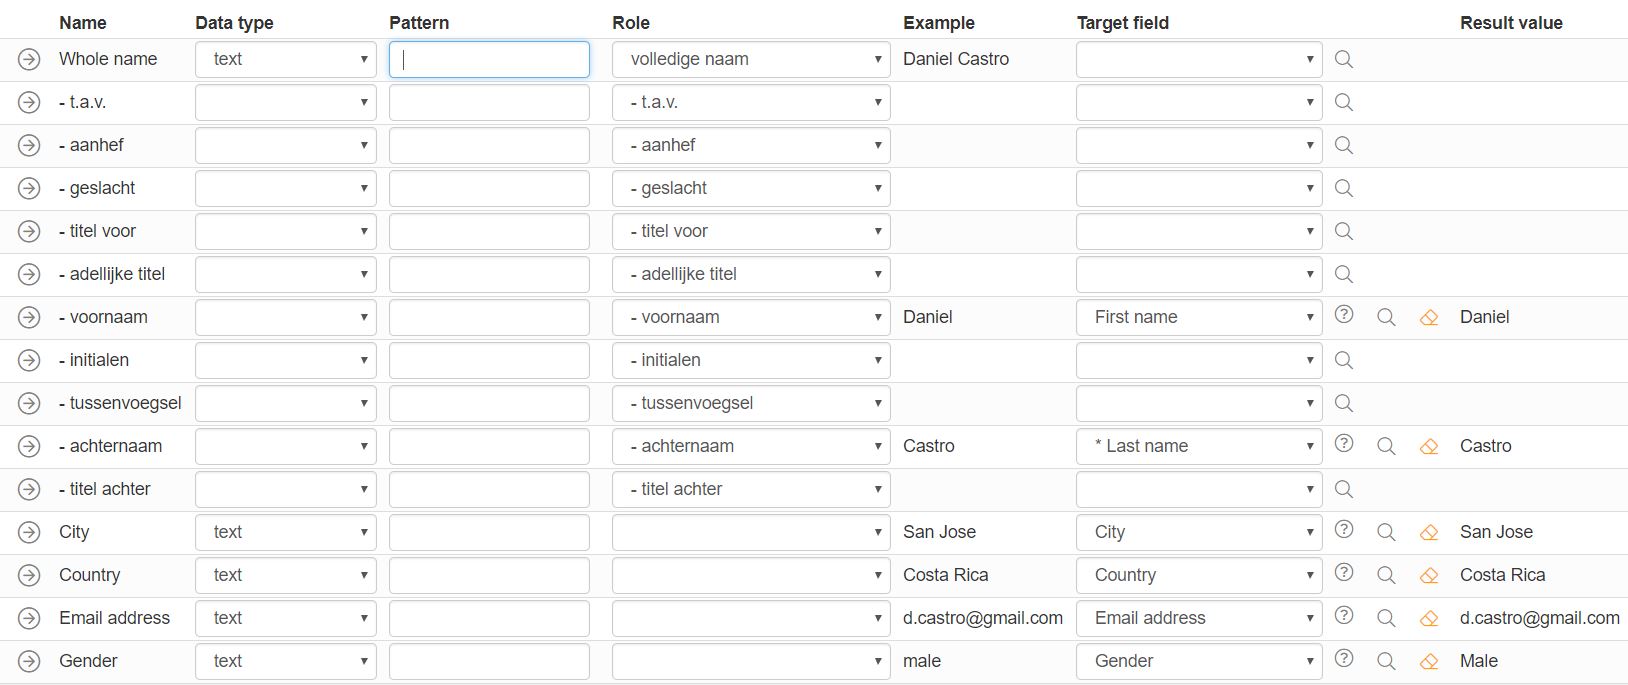
In the Excel database there was a column containing the whole name of a person ("volledige naam"). In the application there is no field 'whole name' but the target fields 'first name' and 'last name'.
- select role 'Volledige naam' (= full name)
- click 'refresh'
- verify that the whole name is divided into 'Voornaam' (first name) and 'Achternaam' (last name)
- select their corresponding target fields
- click 'refresh'
- verify the column with the 'result value'
- click 'next screen'
- click 'ok'
The data will now be stored and is accesible through the application.
Using a calculation to convert data
Data can be converted before it is imported by entering an expression in the "calculation" field. Suppose you want to change "mr." to "m" in the "gender" column in the example above:
- Click on the Details button next to the "gender" row
- Enter the expression Replace(Example;"mr.";"m") in the "calculation" field
- Click 'Ok' and you will see that the value "mr" is replaced by "m" in the "gender" row
Suppose you have a field in your import with a decimal number datatype and you want to change the decimal separator form "," to ".".
Enter the expression Replace(Example;",";".") in the "calculation" field of the field with that decimal number in it.
If you are importing with the load direct option you proceed as follows:
- Click on the Details button next to the "gender" row
- Enter the expression Replace(@var,'male','m') in the "MySQL Conversion" field
- Click 'Ok' and you will see that the value "male" is replaced by "m" in the "gender" row
Deduplication
Data that is imported can be checked against data already in the database. To be able to deduplicate, deduplicate group IDs have to be set in the "Define mappings and constants"-screen in the "Dedup."-column. Give the columns which are part of your deduplication defitnition the same number. E.g.emailadress and gender. There are then three possible ways of handling duplicate data that can be selected in the screen after the aforementioned one:
- Do not import when a duplicate was found - The existing record will not be affected by the import, but can be used as a foreign record when for instance a new order is inserted. This is the default action.
- Overwrite when a duplicate was found - The existing record can be affected by the import, when for instance the import file contains a different email address. The existing record will then be updated with the new email address.
- Do not import when a duplicate was not found - In this case there is no existing record, but you do not want to insert new records. Use this when you only want to update existing records.
When more than 1 field is used in a deduplication group you can use the "Allow empty values (E)" column to set if the deduplication group should be ignored (default bahaviour) when en empty value is found or not (check the field in that case).
Saving import definitions
It is possible to save your import definitions. This can be very useful if you want to add similar data to the same database multiple times. This way, you do not need to define the target fields again. Just click the "Save as..."-button in the "Define mappings and constants"-screen.
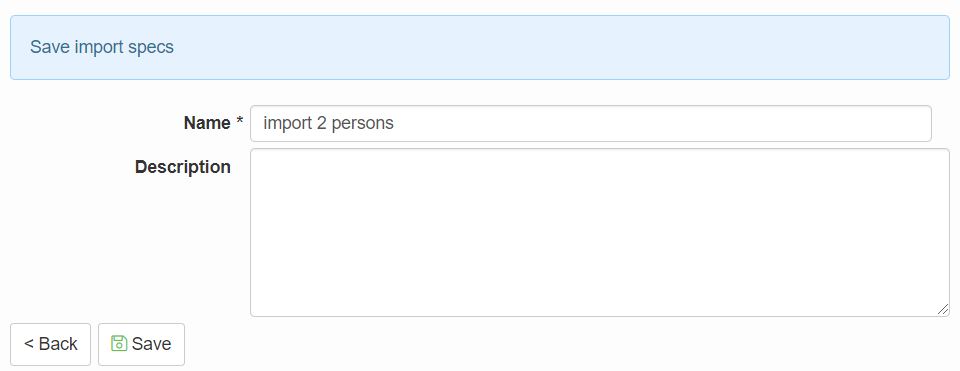
press 'Save'
Open import definition
When you want to reuse your definition you can open them through the menu (Blueprint -> import -> Open previous import definition).