

-
-
-
- Argon2 password conversion
- Introduction to security
- Secure development
- Security certification
- Security Exam
- Field properties concerning security
- Developing user groups securely
- Security considerations for user interface
- Secure file organization
- Securely using the request
- Cross Site Scripting (XSS)
- Other options concerning secure development
- Security analysis
- Secure deployment
- Secure application management
- Scrambling of testdata
- Anonymization of personal data
- Using robots.txt
- Permission settings
- Security measures
- Data encryption
Permission settings
For certain web sites it may be required that visitors have access to (some of) their personal details, e.g. to opt-in/out of a newsletter service, while at the same time it may not be desireable to have individual user accounts for all of these visitors in your database. You might want to save these visitors from having to log on to your application in order to make use of such a service, and instead provide a personalized hyperlink from an email using which these visitors may be 'identified'.
Unfortunately (for matters here concerned with) we live in a world where we have search engines, web clients, and the like, scanning and indexing every link a visitor might use, and this practice creates a major security risk in case a single link would give instant access to personal data. Therefore an extra security layer is needed to mitigate this risk using some additional authentication mechanism.
Out of the box, the CrossmarX Application Engine currently provides two such mechanisms:
- Authentication of a personalized link using a Security code which has been provided separately
- Two-factor authentication, allowing the user to gain permission via an additional email containing a single-use permission token
Both mechanisms will explained in detail further on.
Abstract
Permission settings provide a security mechanism to grant access to a certain service to users which are otherwise not formally identified (in other words: are still considered Anonymous Users). This is accomplished by extending the URL to this service with a key parameter which is used to uniquely identify a certain record (typically a record containing some user specific information which is also used by the service). After succesfull identification, the user is requested to further authenticate via one of the mechanisms mentioned above, before access to the service is granted.
Configuring your forms using Permission settings
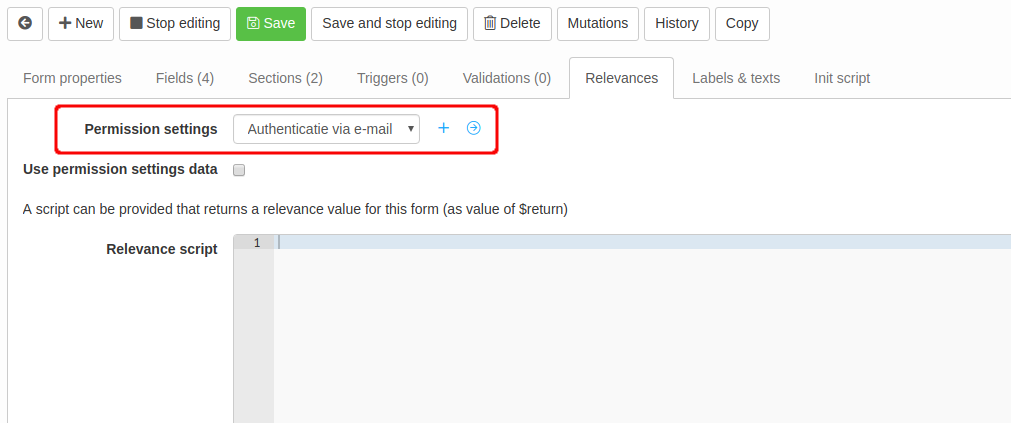
Let's consider the case where you have created a form to insert feedback about an event, and you want to invite a selected group of visitors by email to fill in this form - without those visitors having to log in. This is accomplished by selecting Permission settings on the "Permission"-tab of your form definition:
Once you have reloaded your form, it will no longer be directly accessible. Instead, it can only be opened using a personalized link, as mentoined before, and consequent authentication via one of two available mechanisms. In all other cases a message will be shown, informing the user that access to this form is not permitted. Once the visitor has completed the authentication procedure successfully and access is granted, the form (and possibly other services relying on the same permission settings) can be used as long as the user's session lasts, or permission is required for the same settings but for another identified record.
A more complex case than simply allowing certain visitors to insert some information, is one where those visitors can actually view or modify some of their personal information. Obviously, to do this, a connection needs to be established between the visitor gaining access, and the data on the form. First of all we have to make sure that the Main class (or one of the related target classes) of the form corresponds with the class of the records that are identified by the Permission settings, for example, in a typical case, a class "Person". Second, the option Use permission settings data below the selected Permission settings should be checked. Now, after a visitor has successfully identified itself with a record of the applicable class, the relevant data from that record is automatically loaded into the form.
Creating Permission settings
New Permission settings can be created directly from the form, by clicking on the plus-symbol next to the field Permission settings, or from the "Blueprint"-menu in sub menu "Forms & filters":
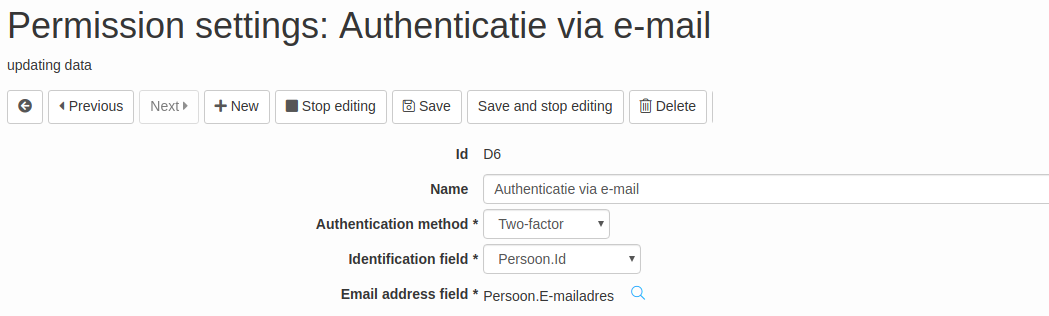
Above are the Permission settings we selected on the form. Besides a name of your own choice, Permission settings consist of an Authentication method, an Identification field, and, depending on the Authentication method chosen, a Security code field or an Email address field. The Authentication method can be either Security code, resulting in the user being asked to reveal a personal "security code" to gain access, or Two-factor where the user is sent an email containing a personalized link with a specific permission token for one time use.
The Identification field is used to retrieve a unique key for the record that is to be used in, and checked for, a personalized link to the service using these Permission settings. This Identification field is typically set to the key field of the class of the identified record, but it can also be any other field in that class, as long as it holds a unique value for each record in the database (the "Unique" property of the field must be set).
The Email address field contains a route to a field that is used to retrieve the email address for the 'owner' of the personalized link, in order to send the additional email containing the permission token. In most cases this would be a field in the same class as the Identification field, but this is not necessarily so. Make sure though that it actually holds the email address which corresponds with the identified record.
The Security code field works in much of the same way, be it that it should point to a field holding the personal security code (this may be any string of characters, as long as it's deemed secure and unique enough for your service). The value of this code should of course be known by the user of a personalized link; it may be included somewhere in the email containing the link, but never IN the link itself.
Creating a personalized link
In order to provide your users with a personalized link for accessing a form using permission settings, the following Velocity snippet will create one, given that $recipient holds a record that can be identified by the applicable Permission settings (and is most likely also the recipient of an email that contains this link), and "P1" is the key identifier of your form:
#set ($personalizedUrl = $session.getOpenFormUrl($recipient, "P1"))
This will create a link similar to:
https://yourdomain.com/engine?service=classmanager:form:P1&cmd=new&target=2KGcxY1YgKoO9fBqdqFQkw
The parameter "target" holds the (encrypted) value retrieved from the $recipient record using the Identification field and is used to identify this record during the authentication process that is started once this link is used.
If you want to create your own link (for example using Custom urls), the value for the target-parameter can be retrieved for a given $record using this method:
#set ($targetKey = $session.getIdentifierForPermission($record, $permissionSettingsId))
where $permissionSettingsId holds the key identifier to the Permission settings you want to use (rather than a form key).
Custom labels and texts
The following label codes are used in permission settings related dialogs, and may be customized for your application:
permission.click to send email
permission.email has been sent
permission.email message
permission.email subject
permission.enter security code
permission.invalid confirmation
permission.invalid security code
permission.invalid token
permission.permission required
permission.security code
Note that the text in your custom version of label code permission.email message should contain a placeholder "$link" which will automatically be replaced by the personalized link containing the permission token in two-factor emails.